SolarWinds – SendQuick Integration Guide
SolarWinds – SendQuick Integration Guide
1. Purpose of Document
This document is a guide on how to integrate SolarWinds with SendQuick systems to send SMS alerts. In this guide, we will be using SendQuick Alert Plus Version 20150606-10HF6 and SolarWinds NPM 2023.3.0 for the integration illustration.
SendQuick supports receiving email SMTP, SNMP Traps or Syslog messages and converts them to SMS text alerts or notification to Social Messenger applications. In this document, we will highlight how to configure SolarWinds to integrate with SendQuick via the email SMTP delivery method to send SMS text alerts.
2.0 Configure SMTP on SolarWinds
When there is a need to send a notification alert, SolarWinds can trigger an email to SendQuick that will then convert the email message to SMS. For this setup, SendQuick has a built-in SMTP that SolarWinds can use as the SMTP Server.
2.1 Configure SMTP Server on SolarWinds
On the dashboard of SolarWinds platform, navigate to the following item:
SETTINGS > All Settings

Scroll down to the ALERTS & REPORTS section, click on Manage SMTP Servers

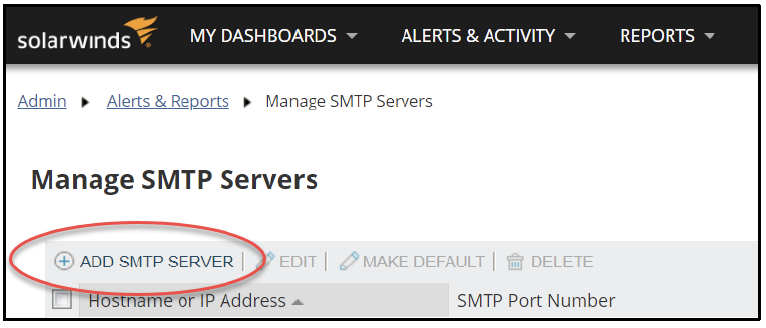
Click on ADD SMTP SERVER
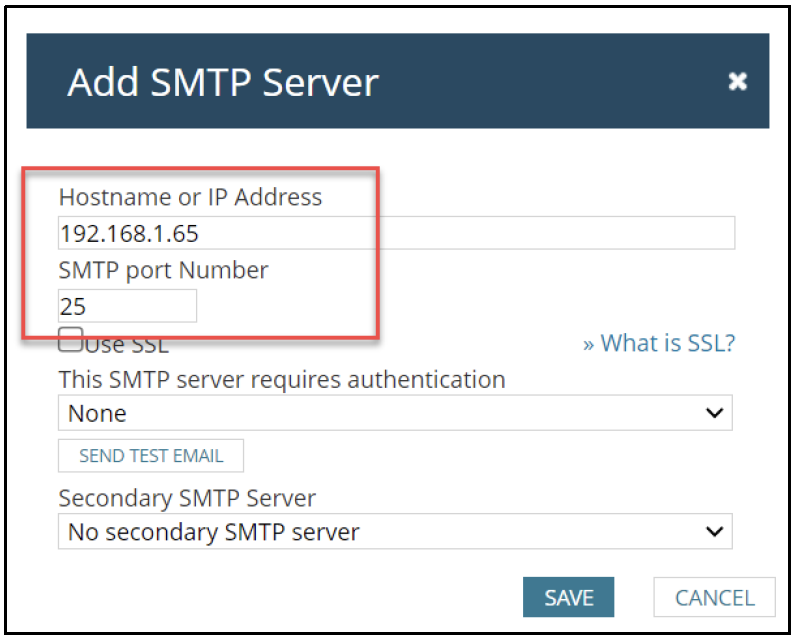
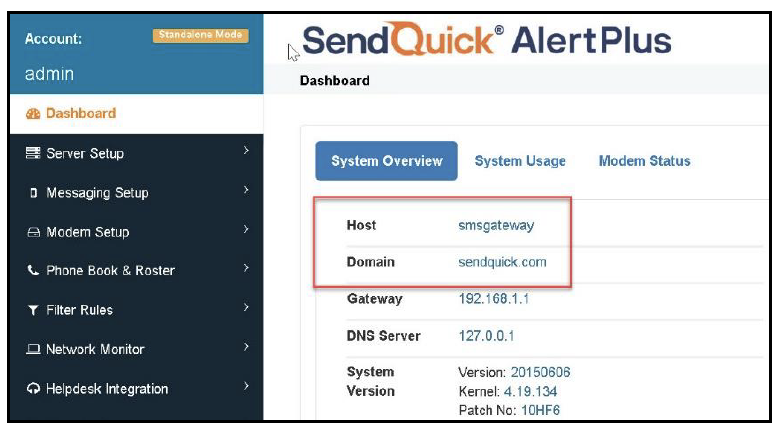
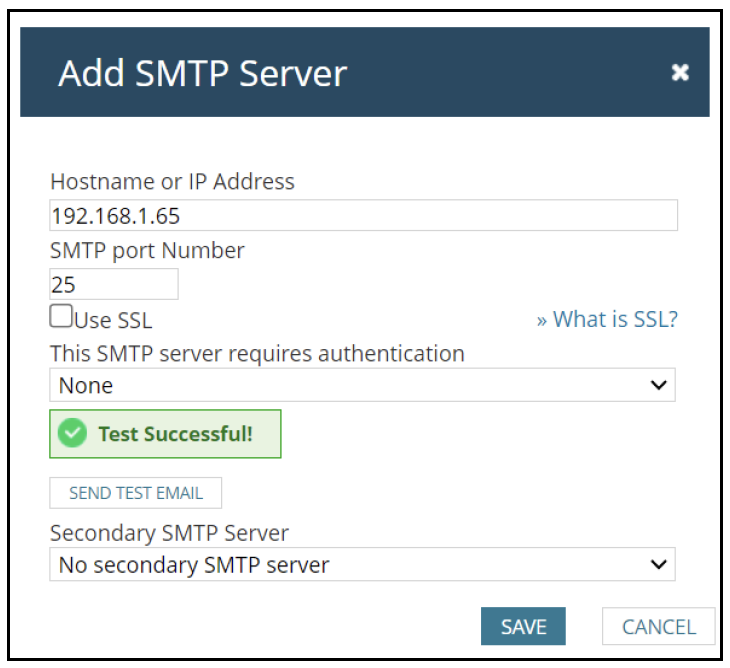
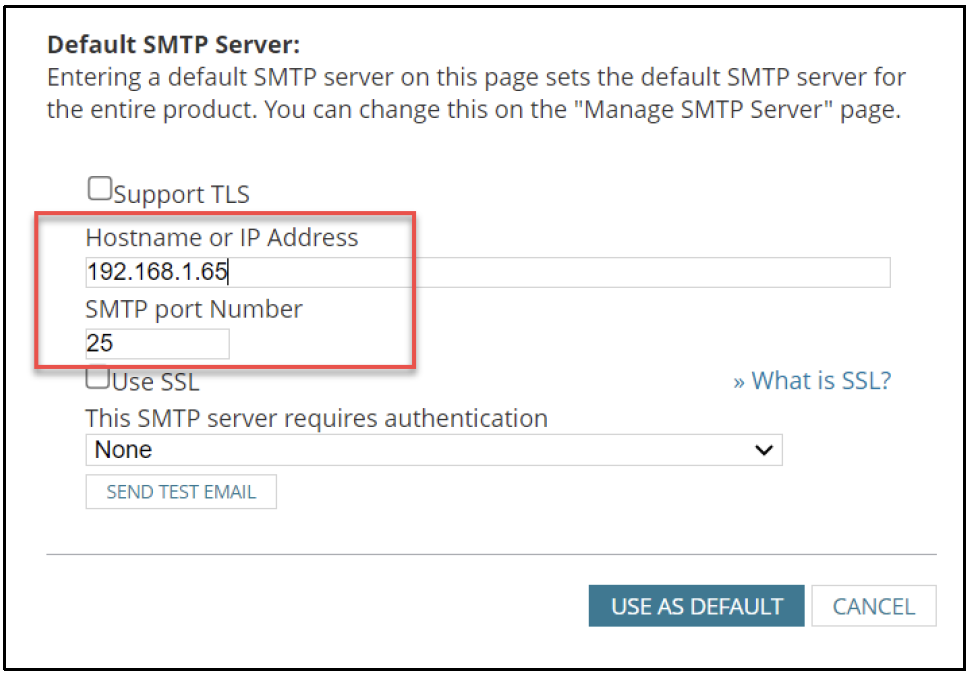
In the field for Hostname or IP Address key in your SendQuick IP address (in our example, we are using 192.168.1.65). By default, the SMTP Port Number is 25. Leave the “Use SSL” box unchecked and leave “This SMTP server requires authentication” selection to None.
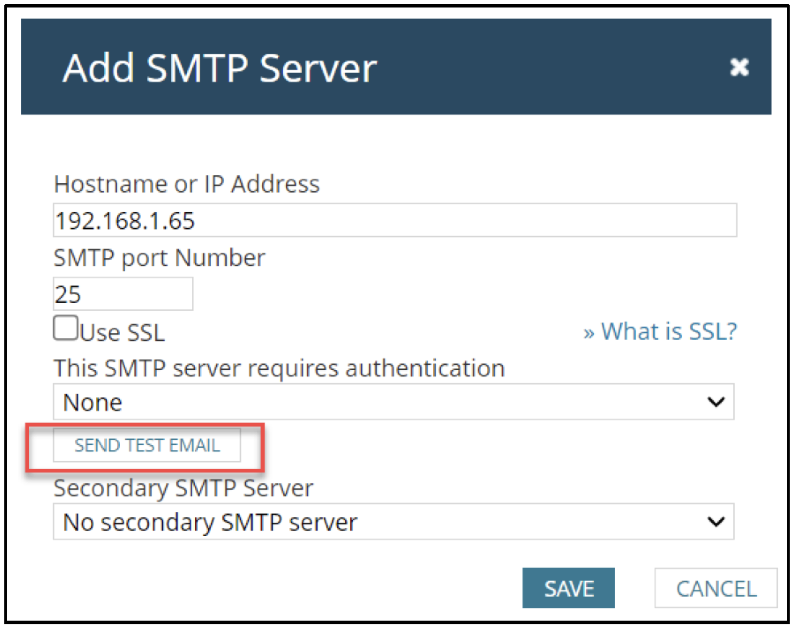
If you would like to test if the SMTP can send an email, click on the SEND TEST EMAIL and test sending an email to see if the setup is correct.
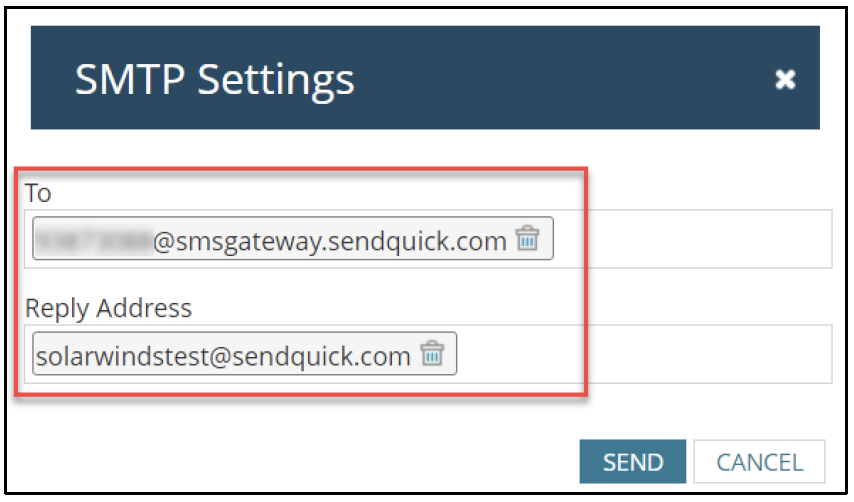
Enter the email address to send the test email in the To field. You can use the email address configured in SendQuick Email Filter Rule (see section 2.2). If you have not done that yet, you can put the phone number to receive the SMS text as the email address using the format <mobilenumber>@<sendquickdomainname>.
Replace <mobilenumber> with the phone number and <sendquickdomainname> with the Domain name of your SendQuick system. You can use any email address for the Reply Address.
If the setup is correct, you should get a Test Successful! notification. Click on “Save” to continue.
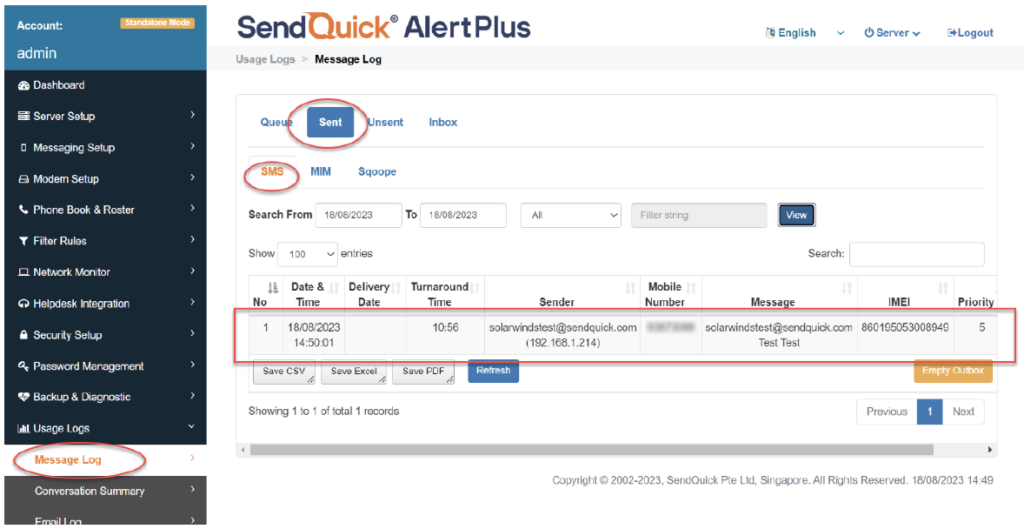
To confirm that SendQuick has subsequently received the email and sent out as SMS, go to SendQuick dashboard. Navigate to:
Usage Logs > Message Logs
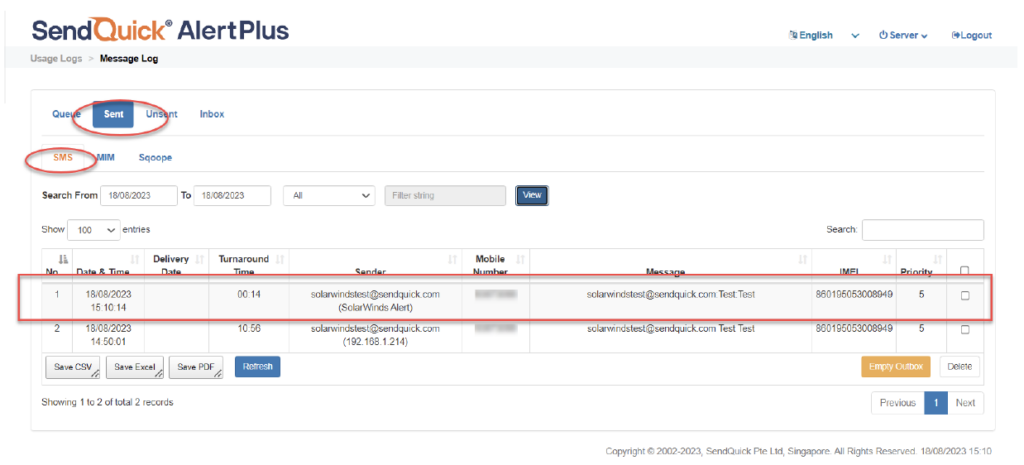
Click on the Sent tab and SMS tab. If there is a corresponding entry in the logs, that means the SMS text was sent successfully.
2.2 Configure Email Filter in SendQuick
SendQuick allows you to configure alerts to be sent to multiple phone numbers, groups or even combination of emails and SMS based on policy filters and specified rules. To explore this feature, navigate on the SendQuick dashboard to:
Filter Rules > Email Filter
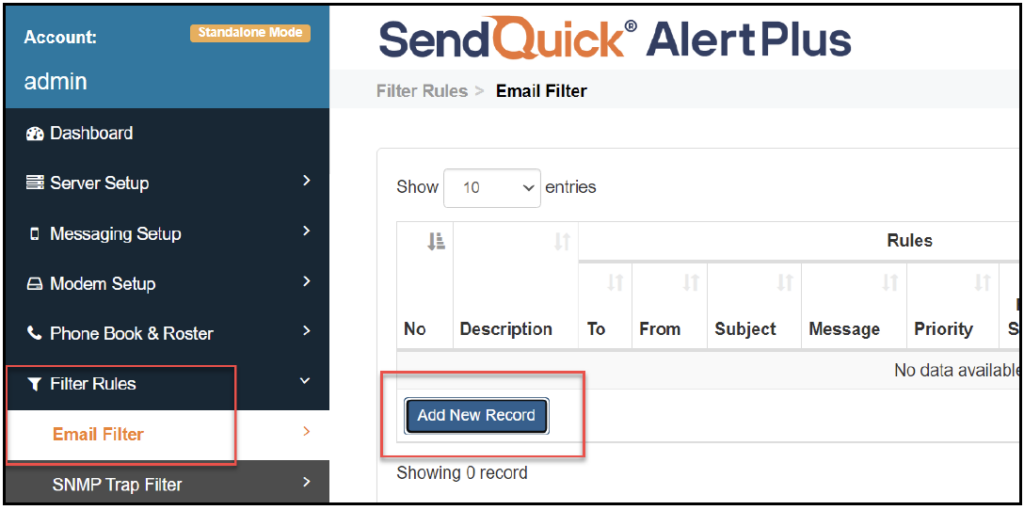
Click on Add New Record.
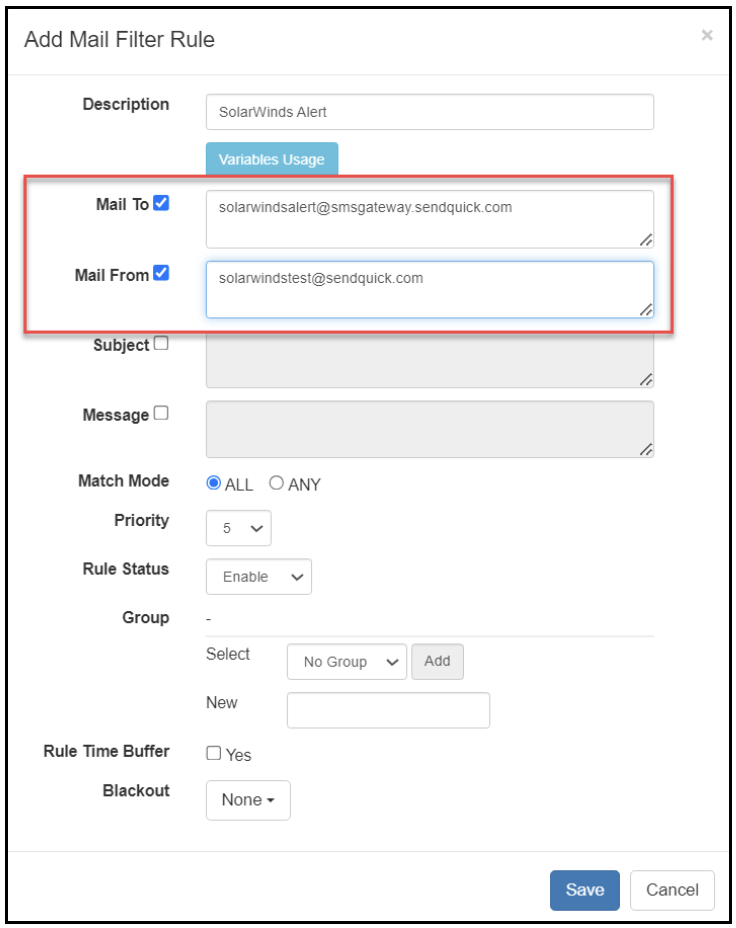
You can then create a new record to define the email address SolarWinds should send to.
In our example, we will use solarwindsalert@smsgateway.sendquick.com and solarwindstest@sendquick.com as the sender email from SolarWinds.
The user email can be anything meaningful that you choose but the domain name of the email address must correspond to your domain name of your SendQuick system.
Fill in the Description, Mail To, Mail From. In our example, our Matching Mode is ALL meaning that the email received will only be processed if it matches all the rules configured. In this example it must match the Mail To and Mail From values for the rule to be processed. Setting it to ANY will mean the email will be processed if it matches at least one of the parameters configured in the filter rule.
Once done, click Save. Refer to our “SendQuick Server Licensing Agreement and Administration Manual” for more details of how to set the parameters for filter rules.
Click on View for the record that you have created.

Then click on Add New Record
You can then add multiple mobile numbers or email to receive the notification alerts when an alert is sent to this email address. After entering the information, click on Save to continue. This email address can now be used as the email address to send email alerts to when configuring SolarWinds. (see next section, Section 2.3)
2.3 Configure Default Email In SolarWinds
In Solarwinds, configure the default email address to send email alerts to that is linked with SendQuick.
On the dashboard of Solarwinds platform, navigate to the following item :
SETTINGS > All Settings

Scroll down to the ALERTS & REPORTS section, click on Configure Default Send Email Action.

In the earlier section 2.2, an email address has been configured in the SendQuick Email Filter rules.
By configuring the Default Send Email Action with that email address and the SMTP pointing to the SendQuick system, will allow SolarWinds to send email alerts to SendQuick that will then send that alert out to the intended recipient via SMS texts.
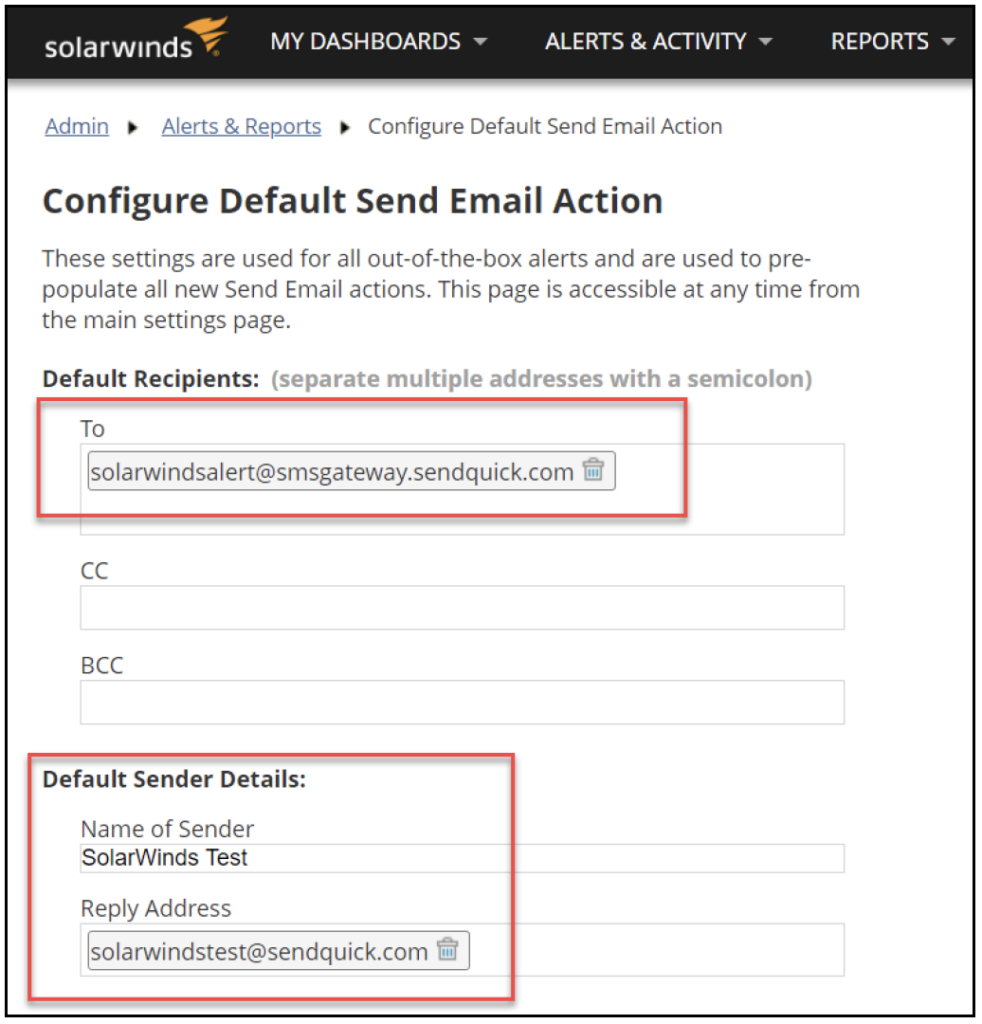
Under Default Recipients, fill in the email address in the To field. In our example, we use solarwindsalert@smsgateway.sendquick.com
Fill in the Name of Sender and Reply Address under the Default Sender Details with
what you want to appear as the Sender information.
Fill in the Hostname or IP Address with the IP Address of your SendQuick system for the Default SMTP Server. You can also make changes to the SMTP Server as explained in Section 2.1
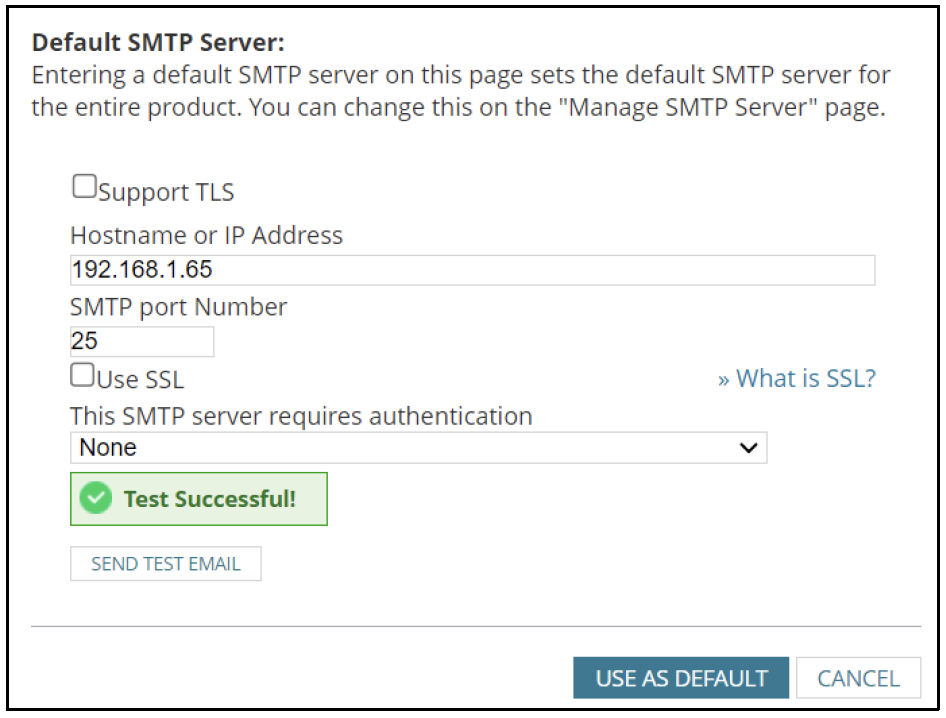
Click on the SEND TEST EMAIL and test sending an email to see if the setup is correct.
If the setup is correct, you should get a Test Successful! notification.
To confirm that SendQuick has subsequently received the email and sent out as SMS, go to SendQuick dashboard. Navigate to:
Usage Logs > Message Logs
Click on the Sent tab and SMS tab. If there is a corresponding entry in the logs, that means the SMS text was sent successfully.
2.4 Configure Alerts in SolarWinds
SolarWinds can monitor and alert many incidents that happens in your network environment. For critical alerts that requires the relevant personnel to be notified as soon as possible via SMS text, configure the Alert Trigger Actions to send the email to SendQuick.
In the SolarWinds, navigate to
ALERTS & ACTIVITY > Alerts

The page will display all the Alerts that has been triggered and requires Acknowledgement from the user. To add or manage existing alerts, click on Manage Alerts as highlighted below.

To add a new alert, click on ADD NEW ALERT

Alternatively, you can modify an existing alert (for example “Node is down” that has been provided by SolarWinds. Select the Alert to edit by checking the box next to it and click on EDIT ALERT.

There are several properties and conditions that you can configure for an Alert. Please refer to the SolarWinds manual to guide you on how to configure them. In this example we are editing an out-of-the-box alert, therefore we can only configure the TRIGGER ACTIONS to define what happens next when an Alert has been triggered.
Click on the TRIGGER ACTIONS tab.

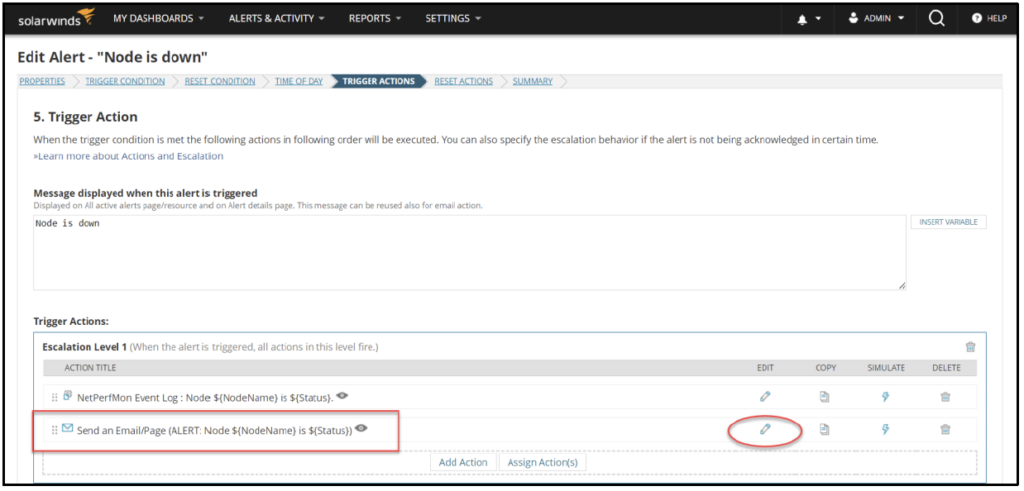
In this out-of-the-box alert example, there are already 2 Trigger Actions defined Click on the Edit (pen icon) for the Send an Email/Page entry. If you are creating a New Alert, then you will need to click on Add Action to add the Send an Email/Page action.
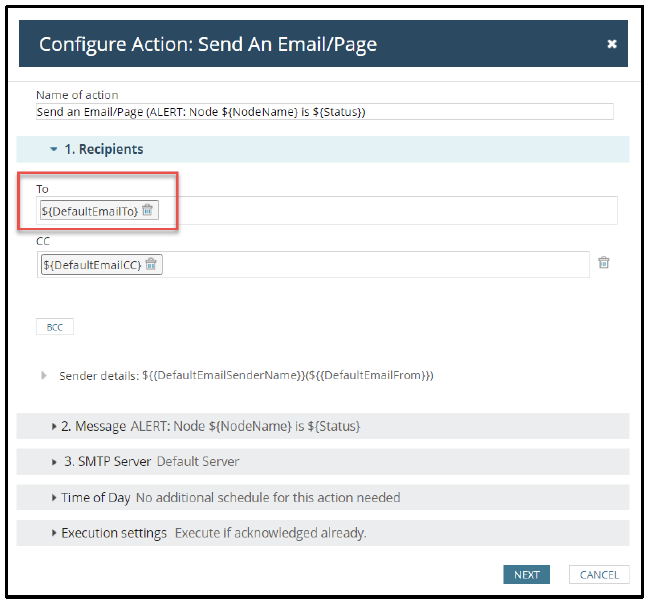
If the default email has already been configured (see Section 2.3), you can then leave the To field as ${DefaultEmailTo}. If not, you can type the email address configured in SendQuick Email Filter Rule in this To field here.
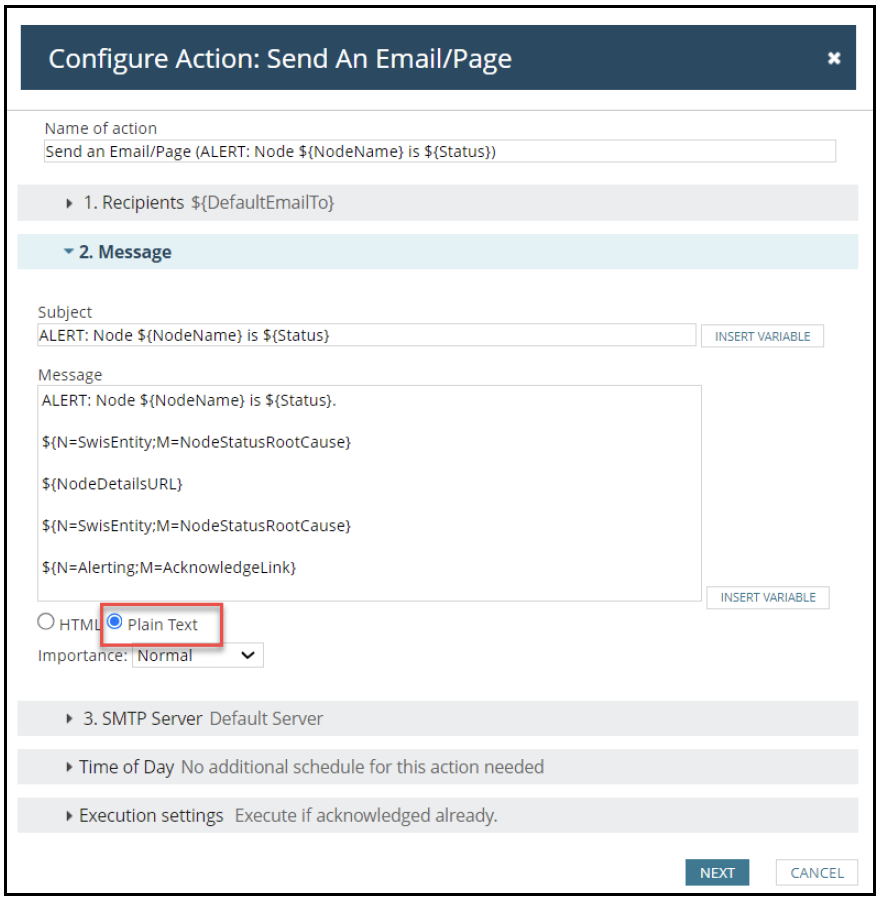
Configure the alert message to send with the relevant variables used by SolarWinds . Ensure the message type is Plain Text. Click on NEXT.
If the default SMTP Server has already been configured (see Section 2.1), then select Default Server. If not, click on Manage SMTP Servers and follow the steps in Section 2.1 to configure the SMTP Server. Click on SAVE CHANGES.
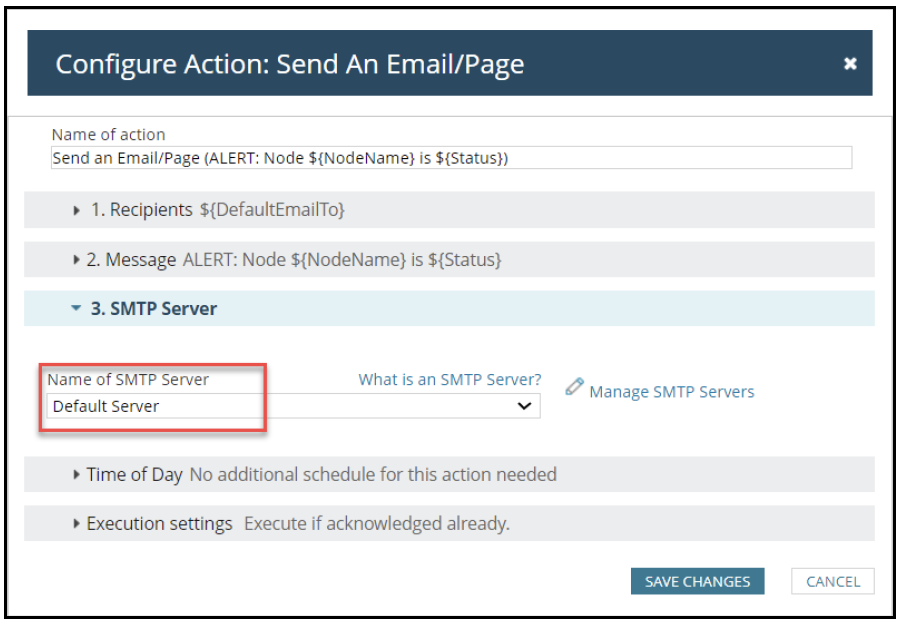
The Trigger Action has now been configured. Ensure the Alert is Enabled.
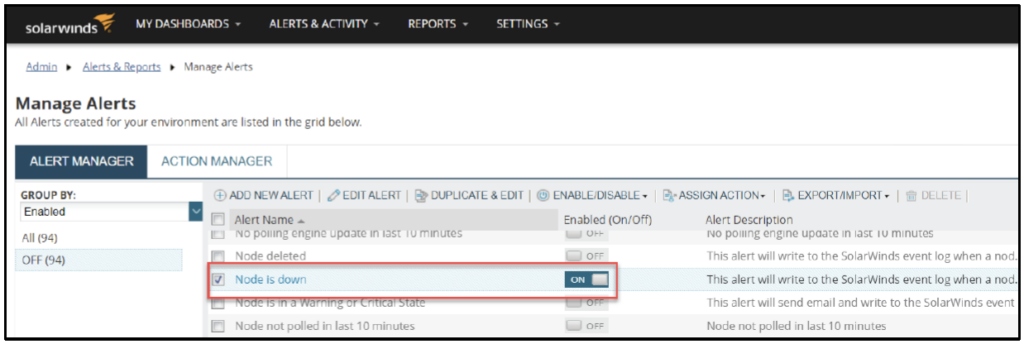
Once enabled, whenever the condition of the Alert is met, it will create an Alert record under the All Active Alerts.

To confirm that SendQuick has subsequently received the email and sent out as SMS, go to SendQuick dashboard. Navigate to:
Usage Logs > Message Logs
Click on the Sent tab and SMS tab. If there is a corresponding entry in the logs, that means the SMS text was sent successfully.


